
1. Open the Documents page & start a new filing
Every Word-based SEC filing in BluePrint begins on the Documents page under the Working files tab. You can upload any Microsoft Word (.docx) draft prepared by your reporting team or outside counsel without pre-formatting tables or stripping Word styles.
Open Documents in the left sidebar
Click Documents in the left navigation bar. The Working files view lists all filings currently in progress in your workspace, while Prior filings provides access to historical EDGAR filings and roll-forward baselines.
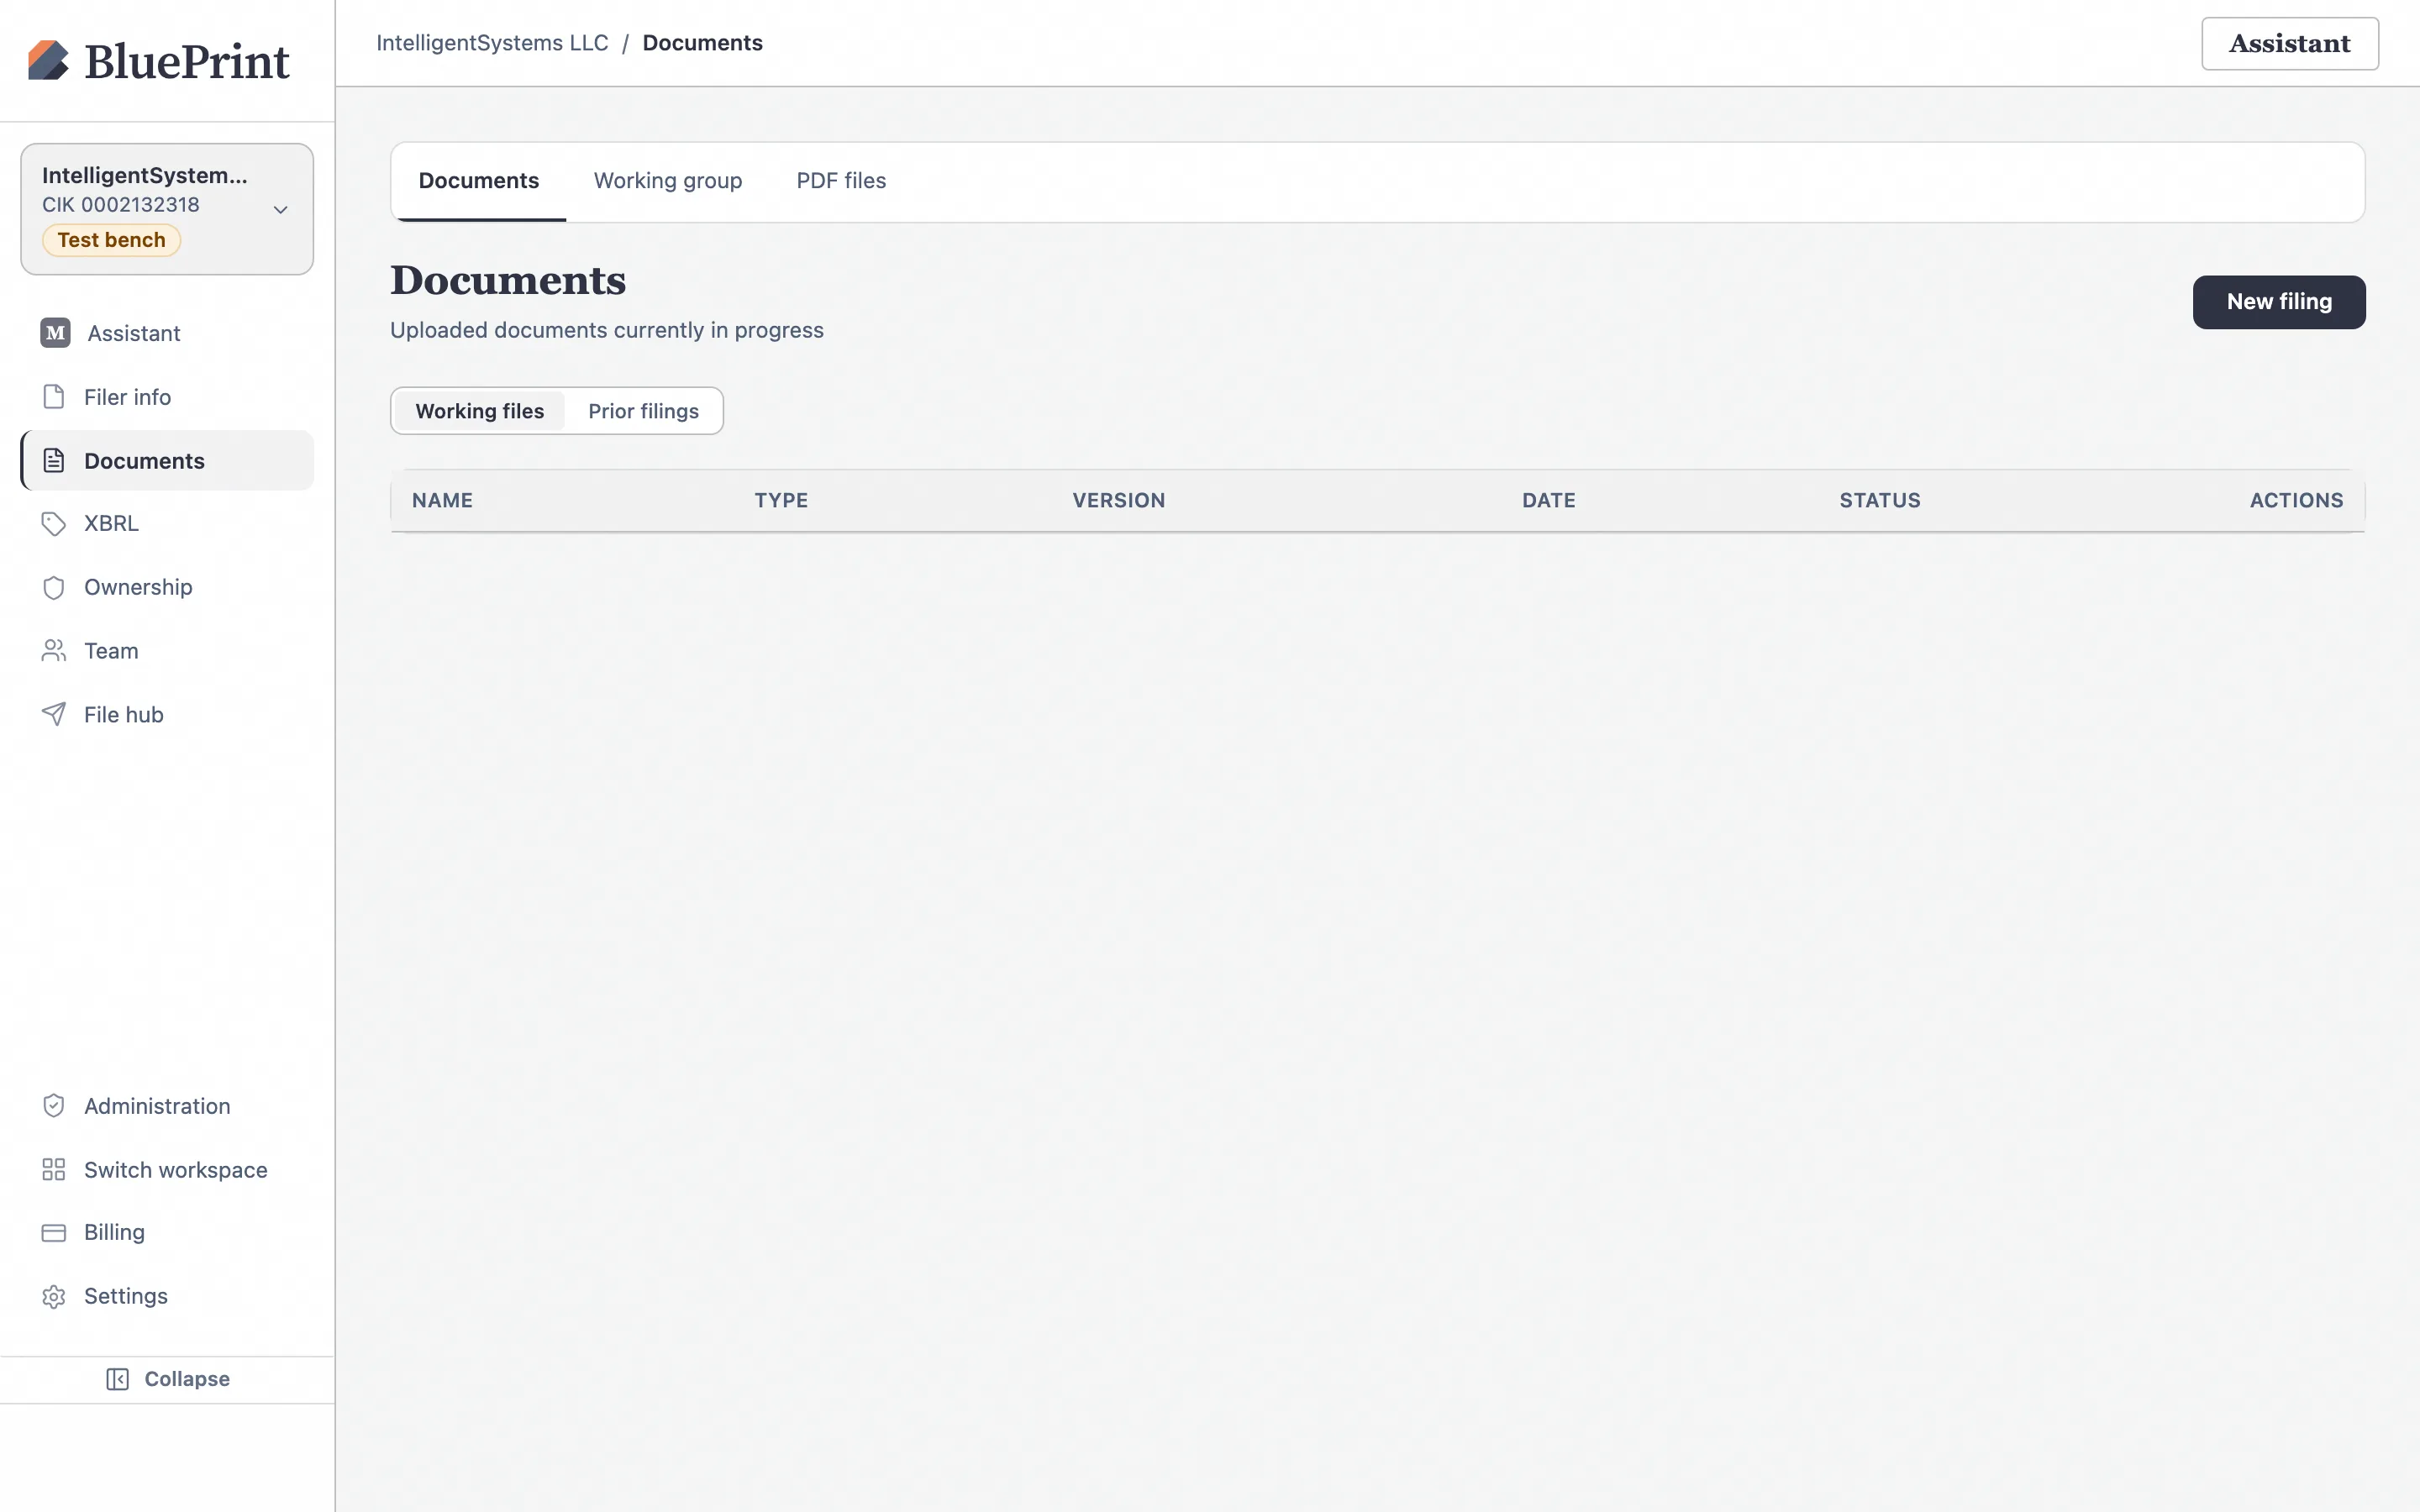
Click New filing to open the upload panel
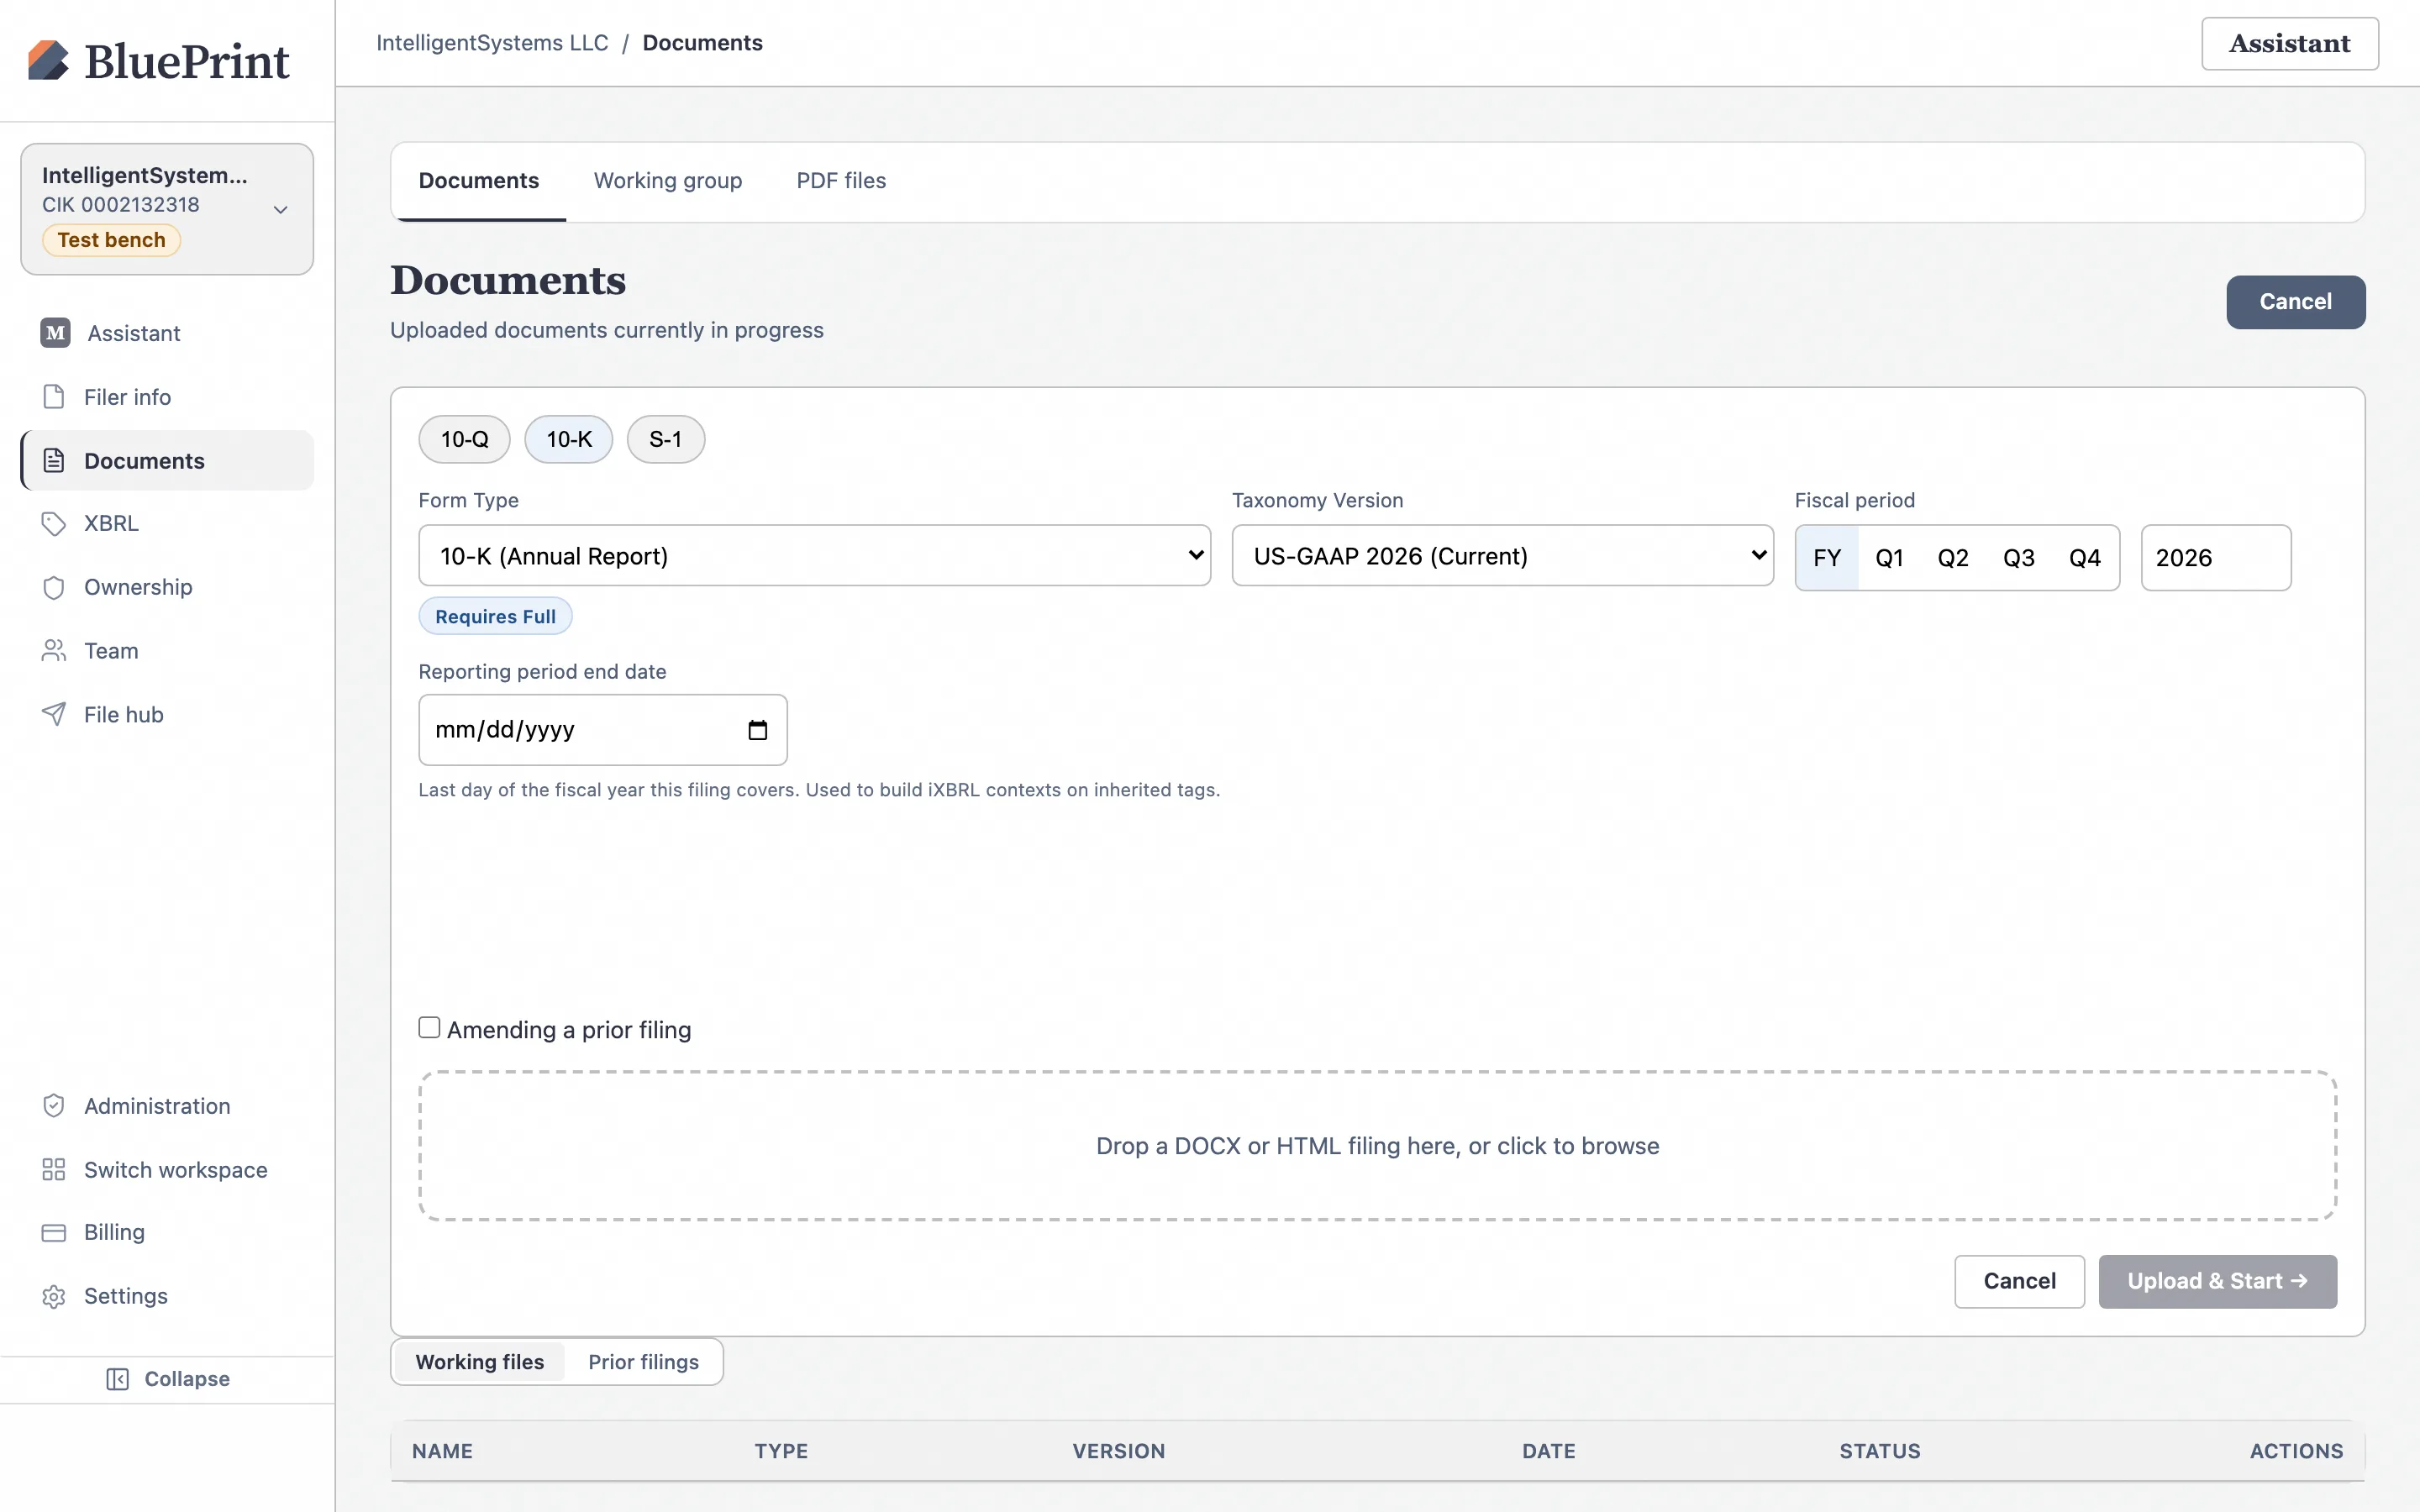
Click the New filing button in the top-right corner of the Documents page. The New filing upload panel opens above the table with a form-type selector and a file drop zone accepting .docx files.
2. Upload your Word (.docx) draft & convert
When you select your form type and upload your Word document, BluePrint’s EDGARization engine parses headings, financial tables, leader-dot Table of Contents rows, double-underlines, footnotes, page breaks, and your Exhibit Index.
Pick the SEC form type and select your .docx file
Choose the filing’s form type from the dropdown (for example, 10-Q, 10-K, 8-K, S-1, or DEF 14A) and drop or select your Word .docx draft. BluePrint auto-fills the filing title from the filename, which you can customize before starting conversion.
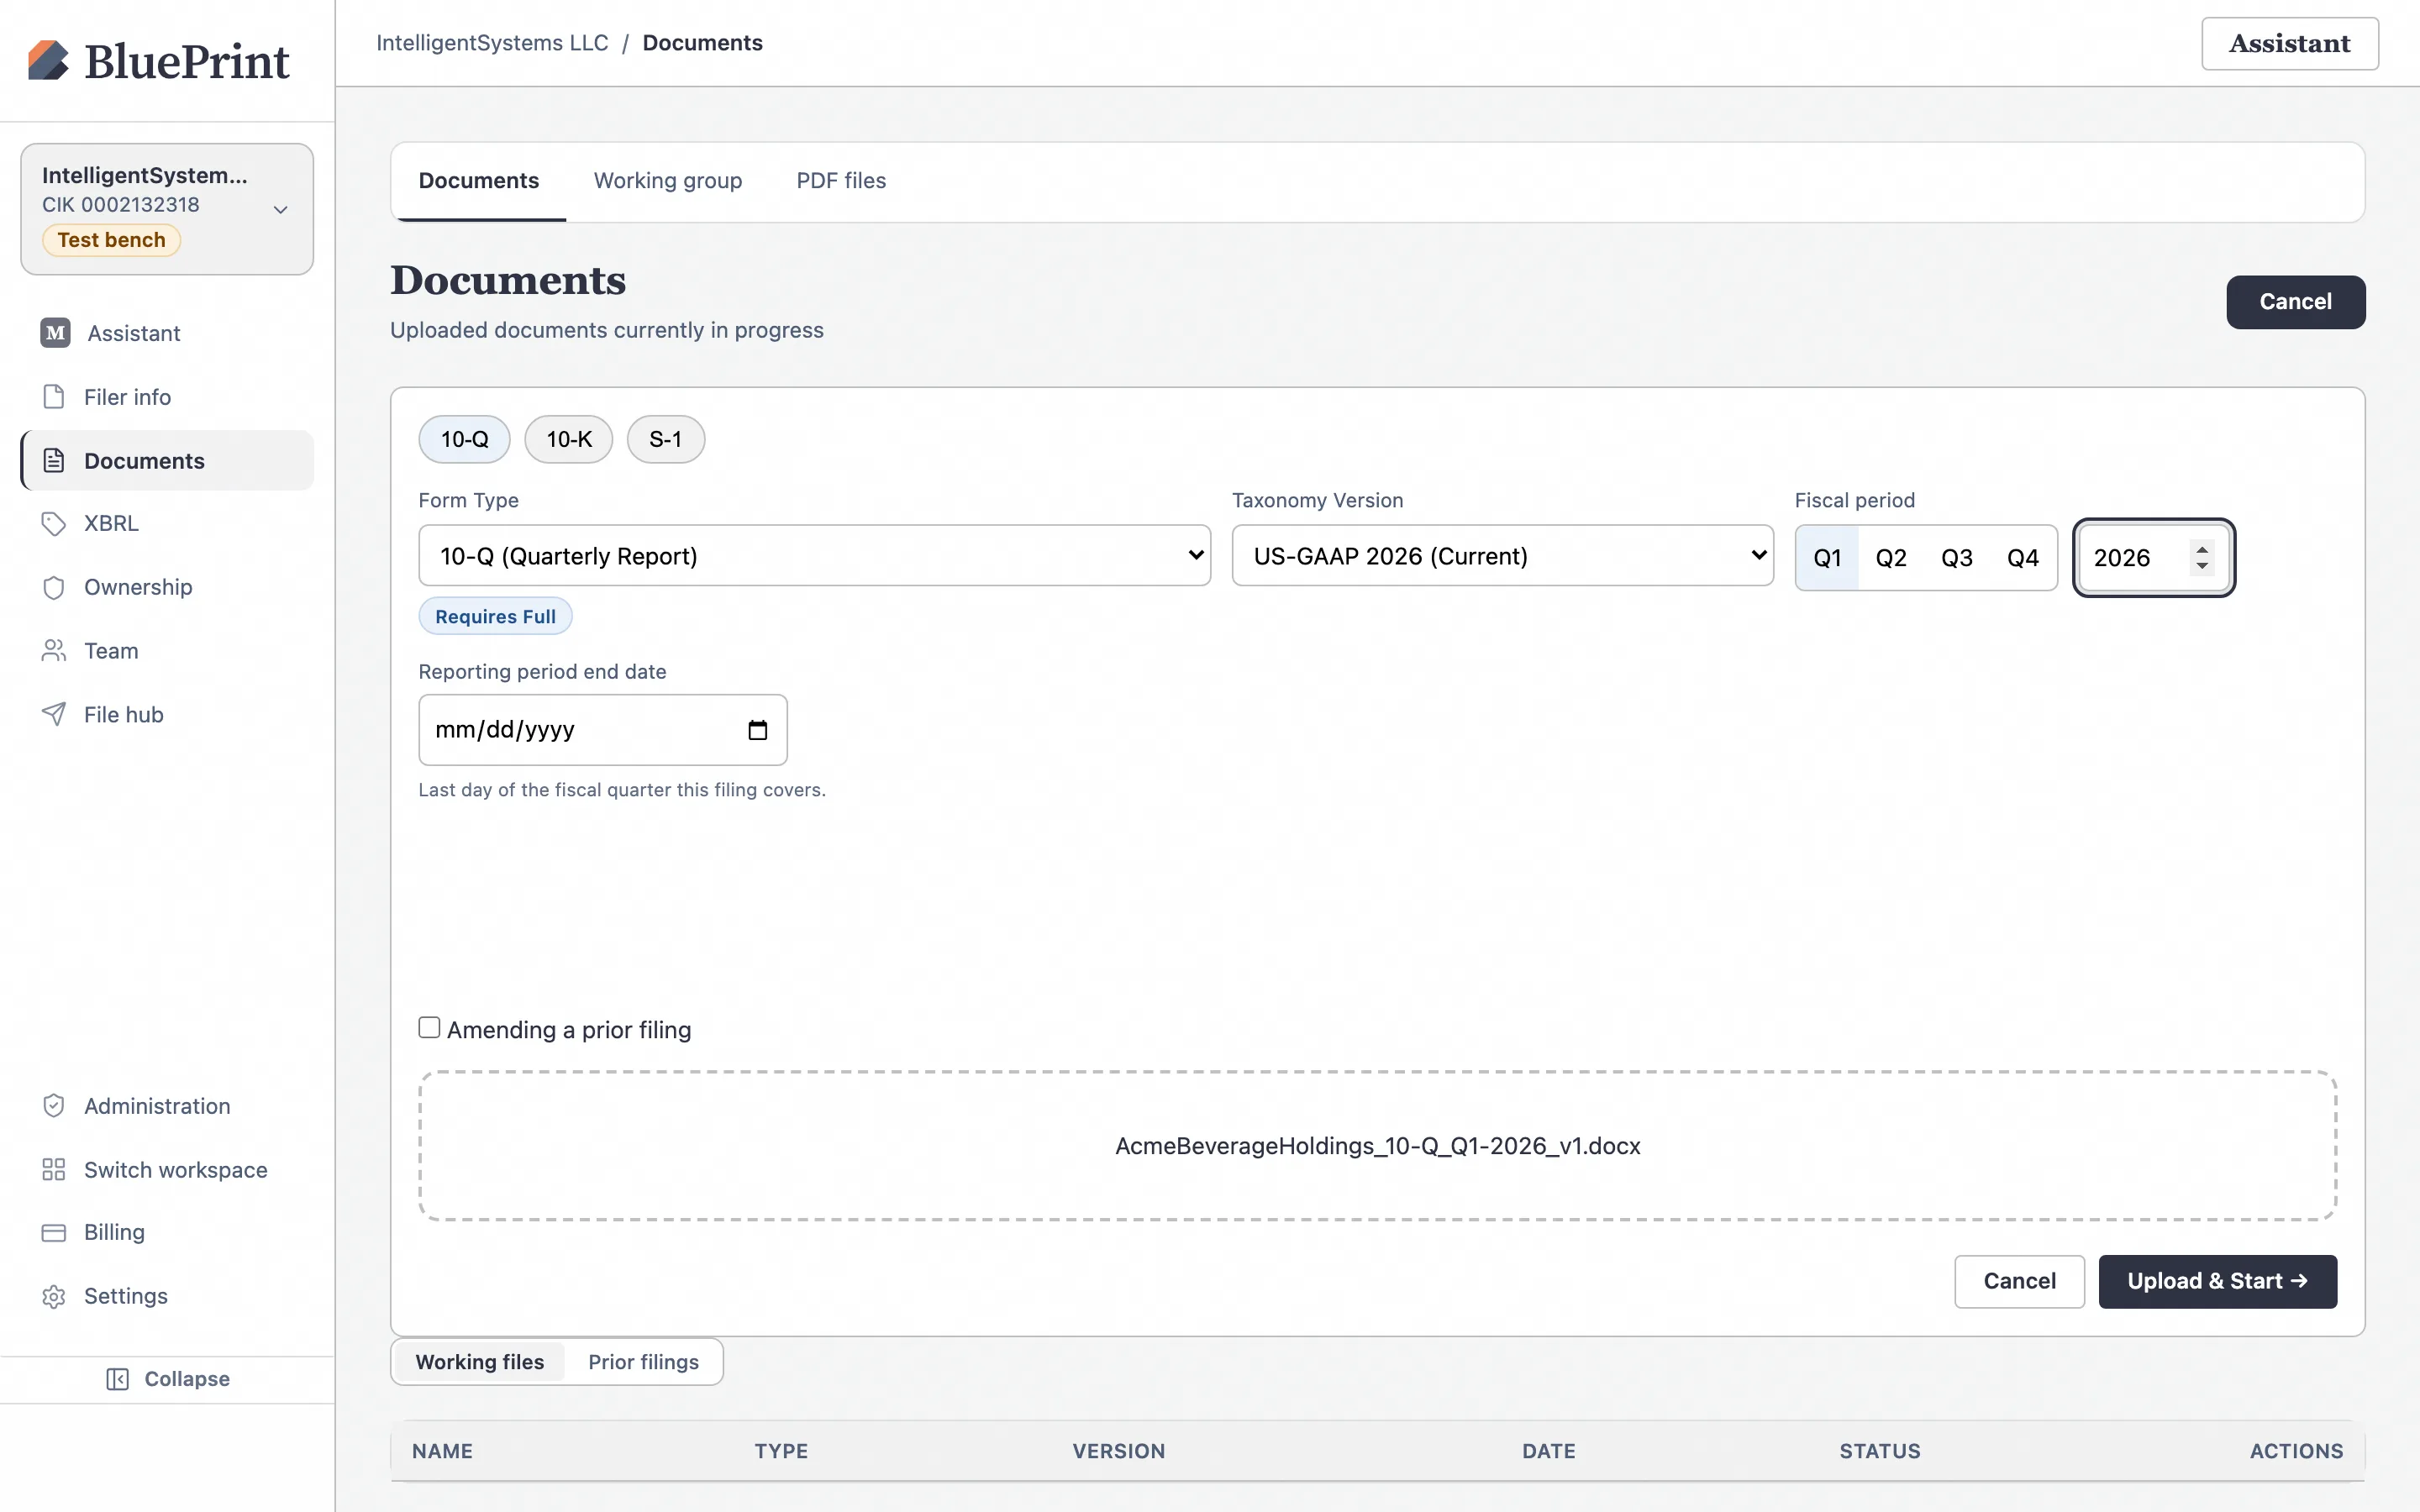
Click Upload & Start
Click Upload & Start. The upload panel closes and a new filing row appears immediately in your Working files table.
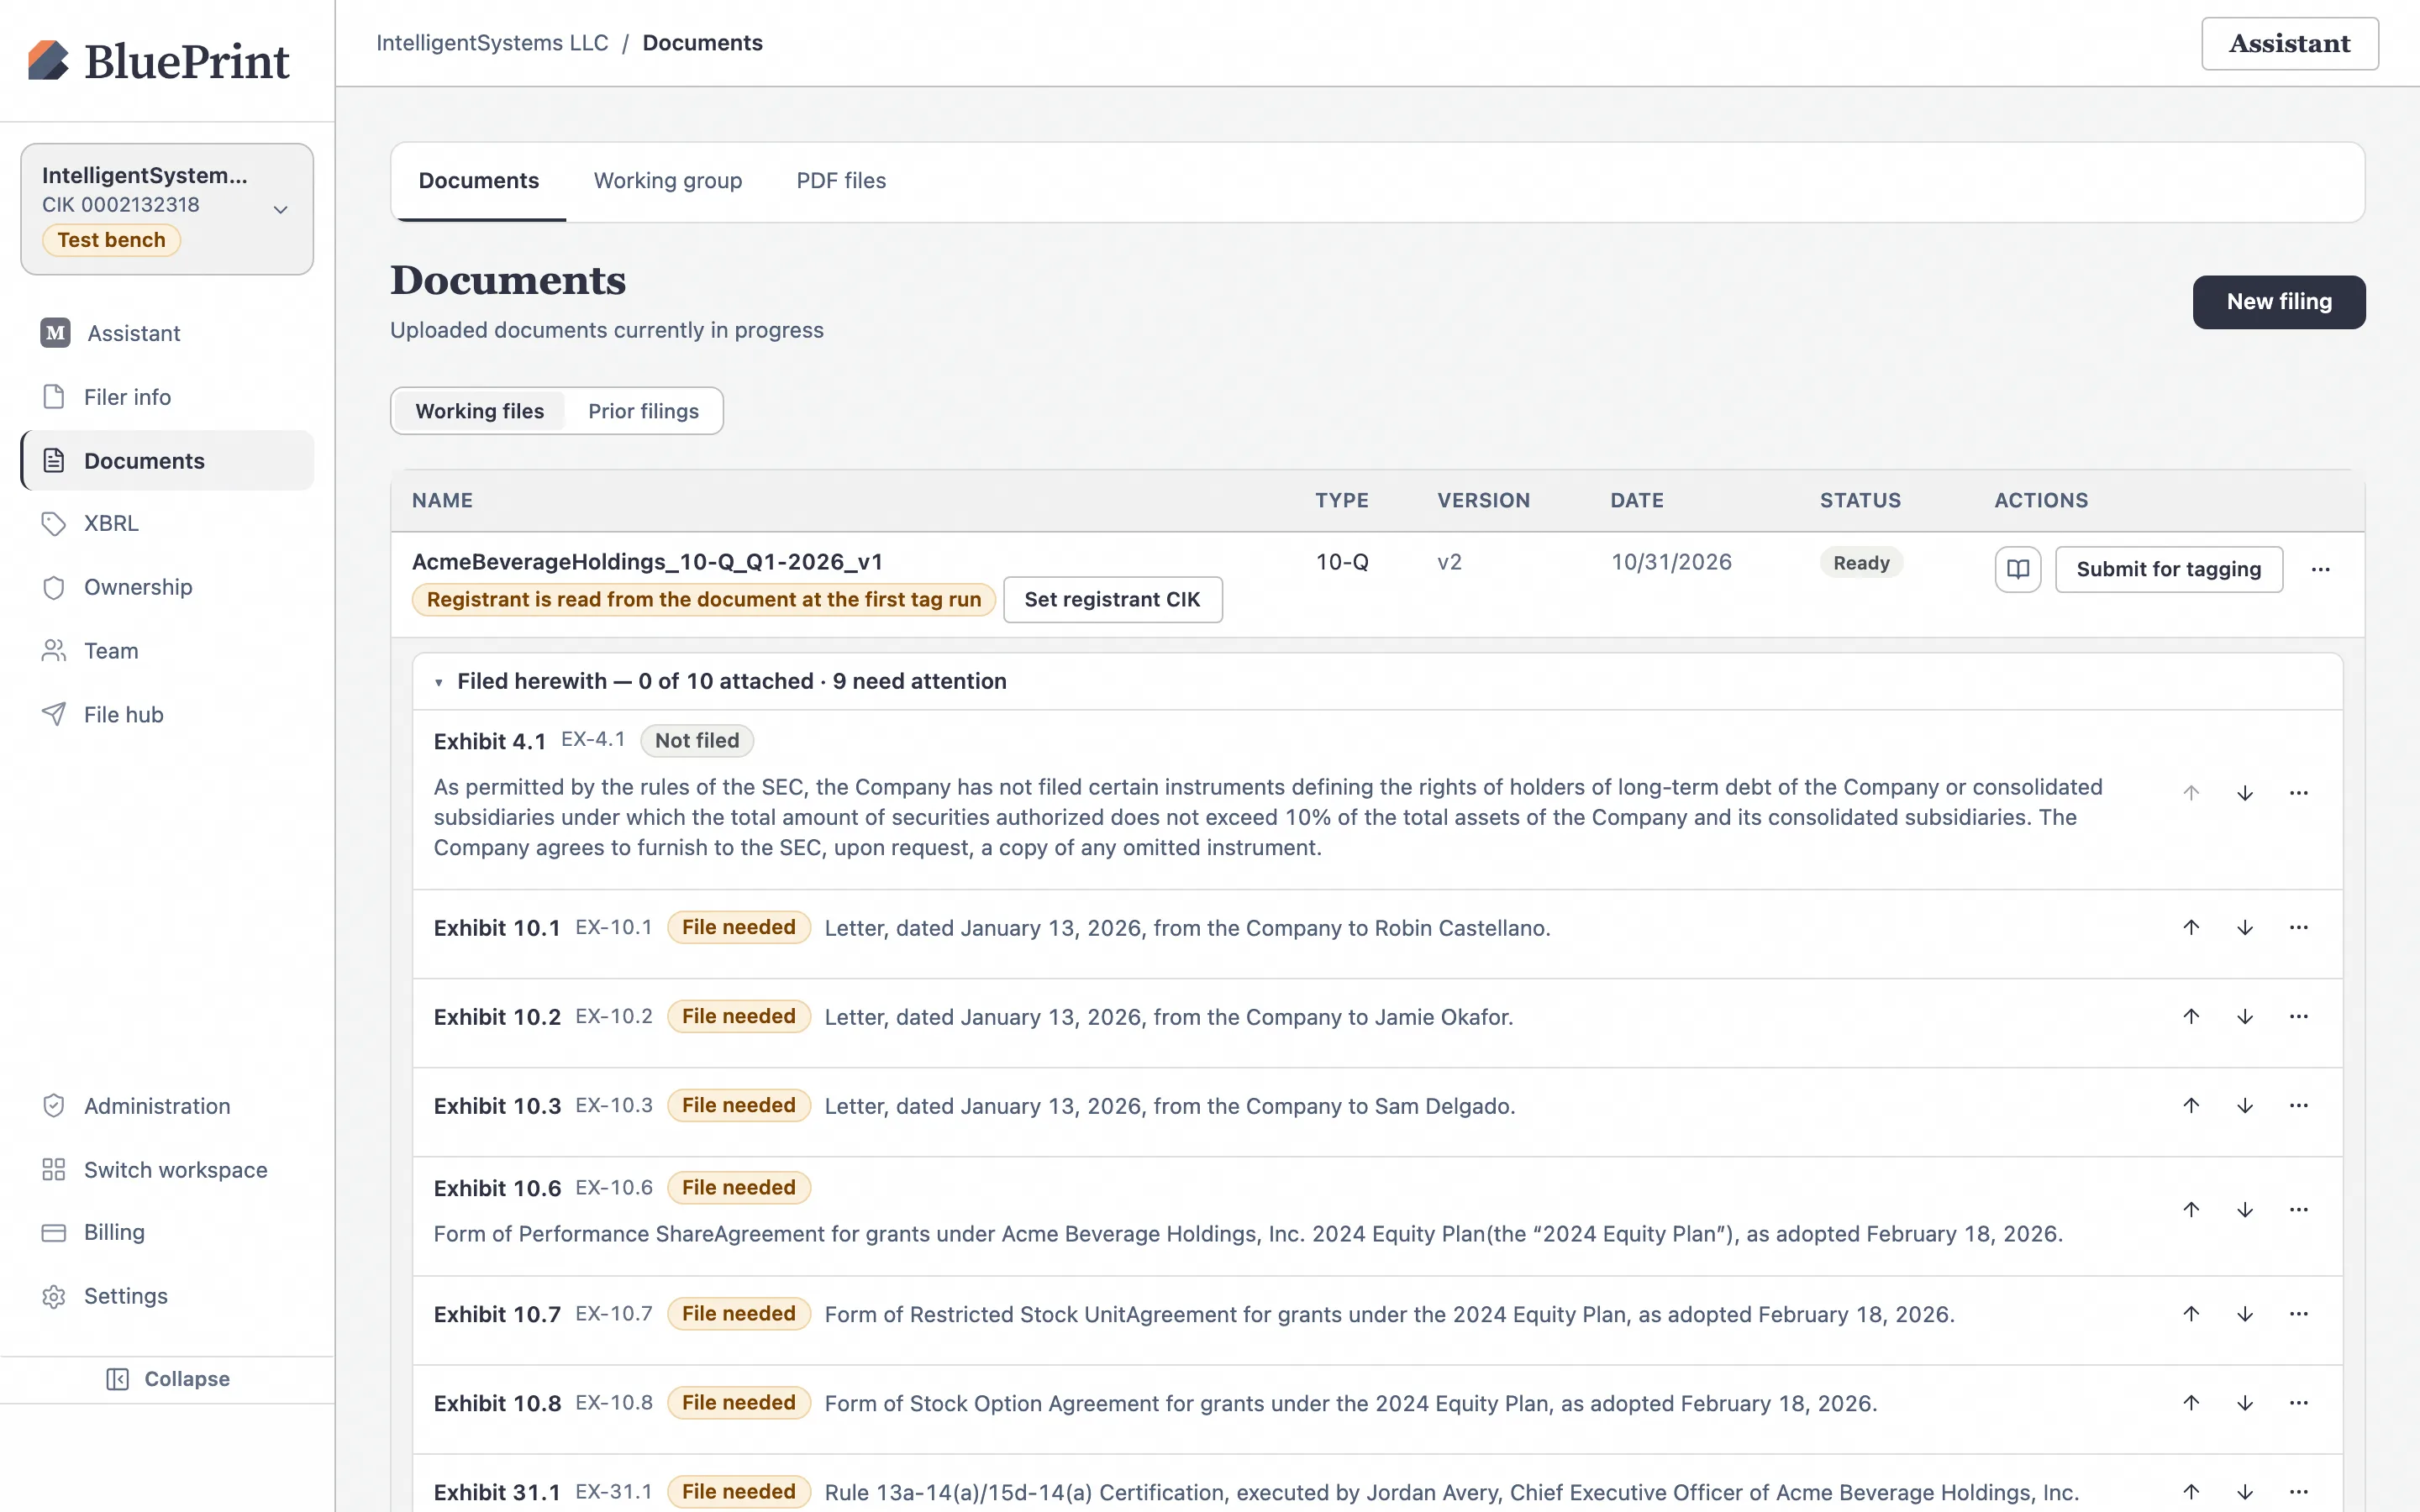
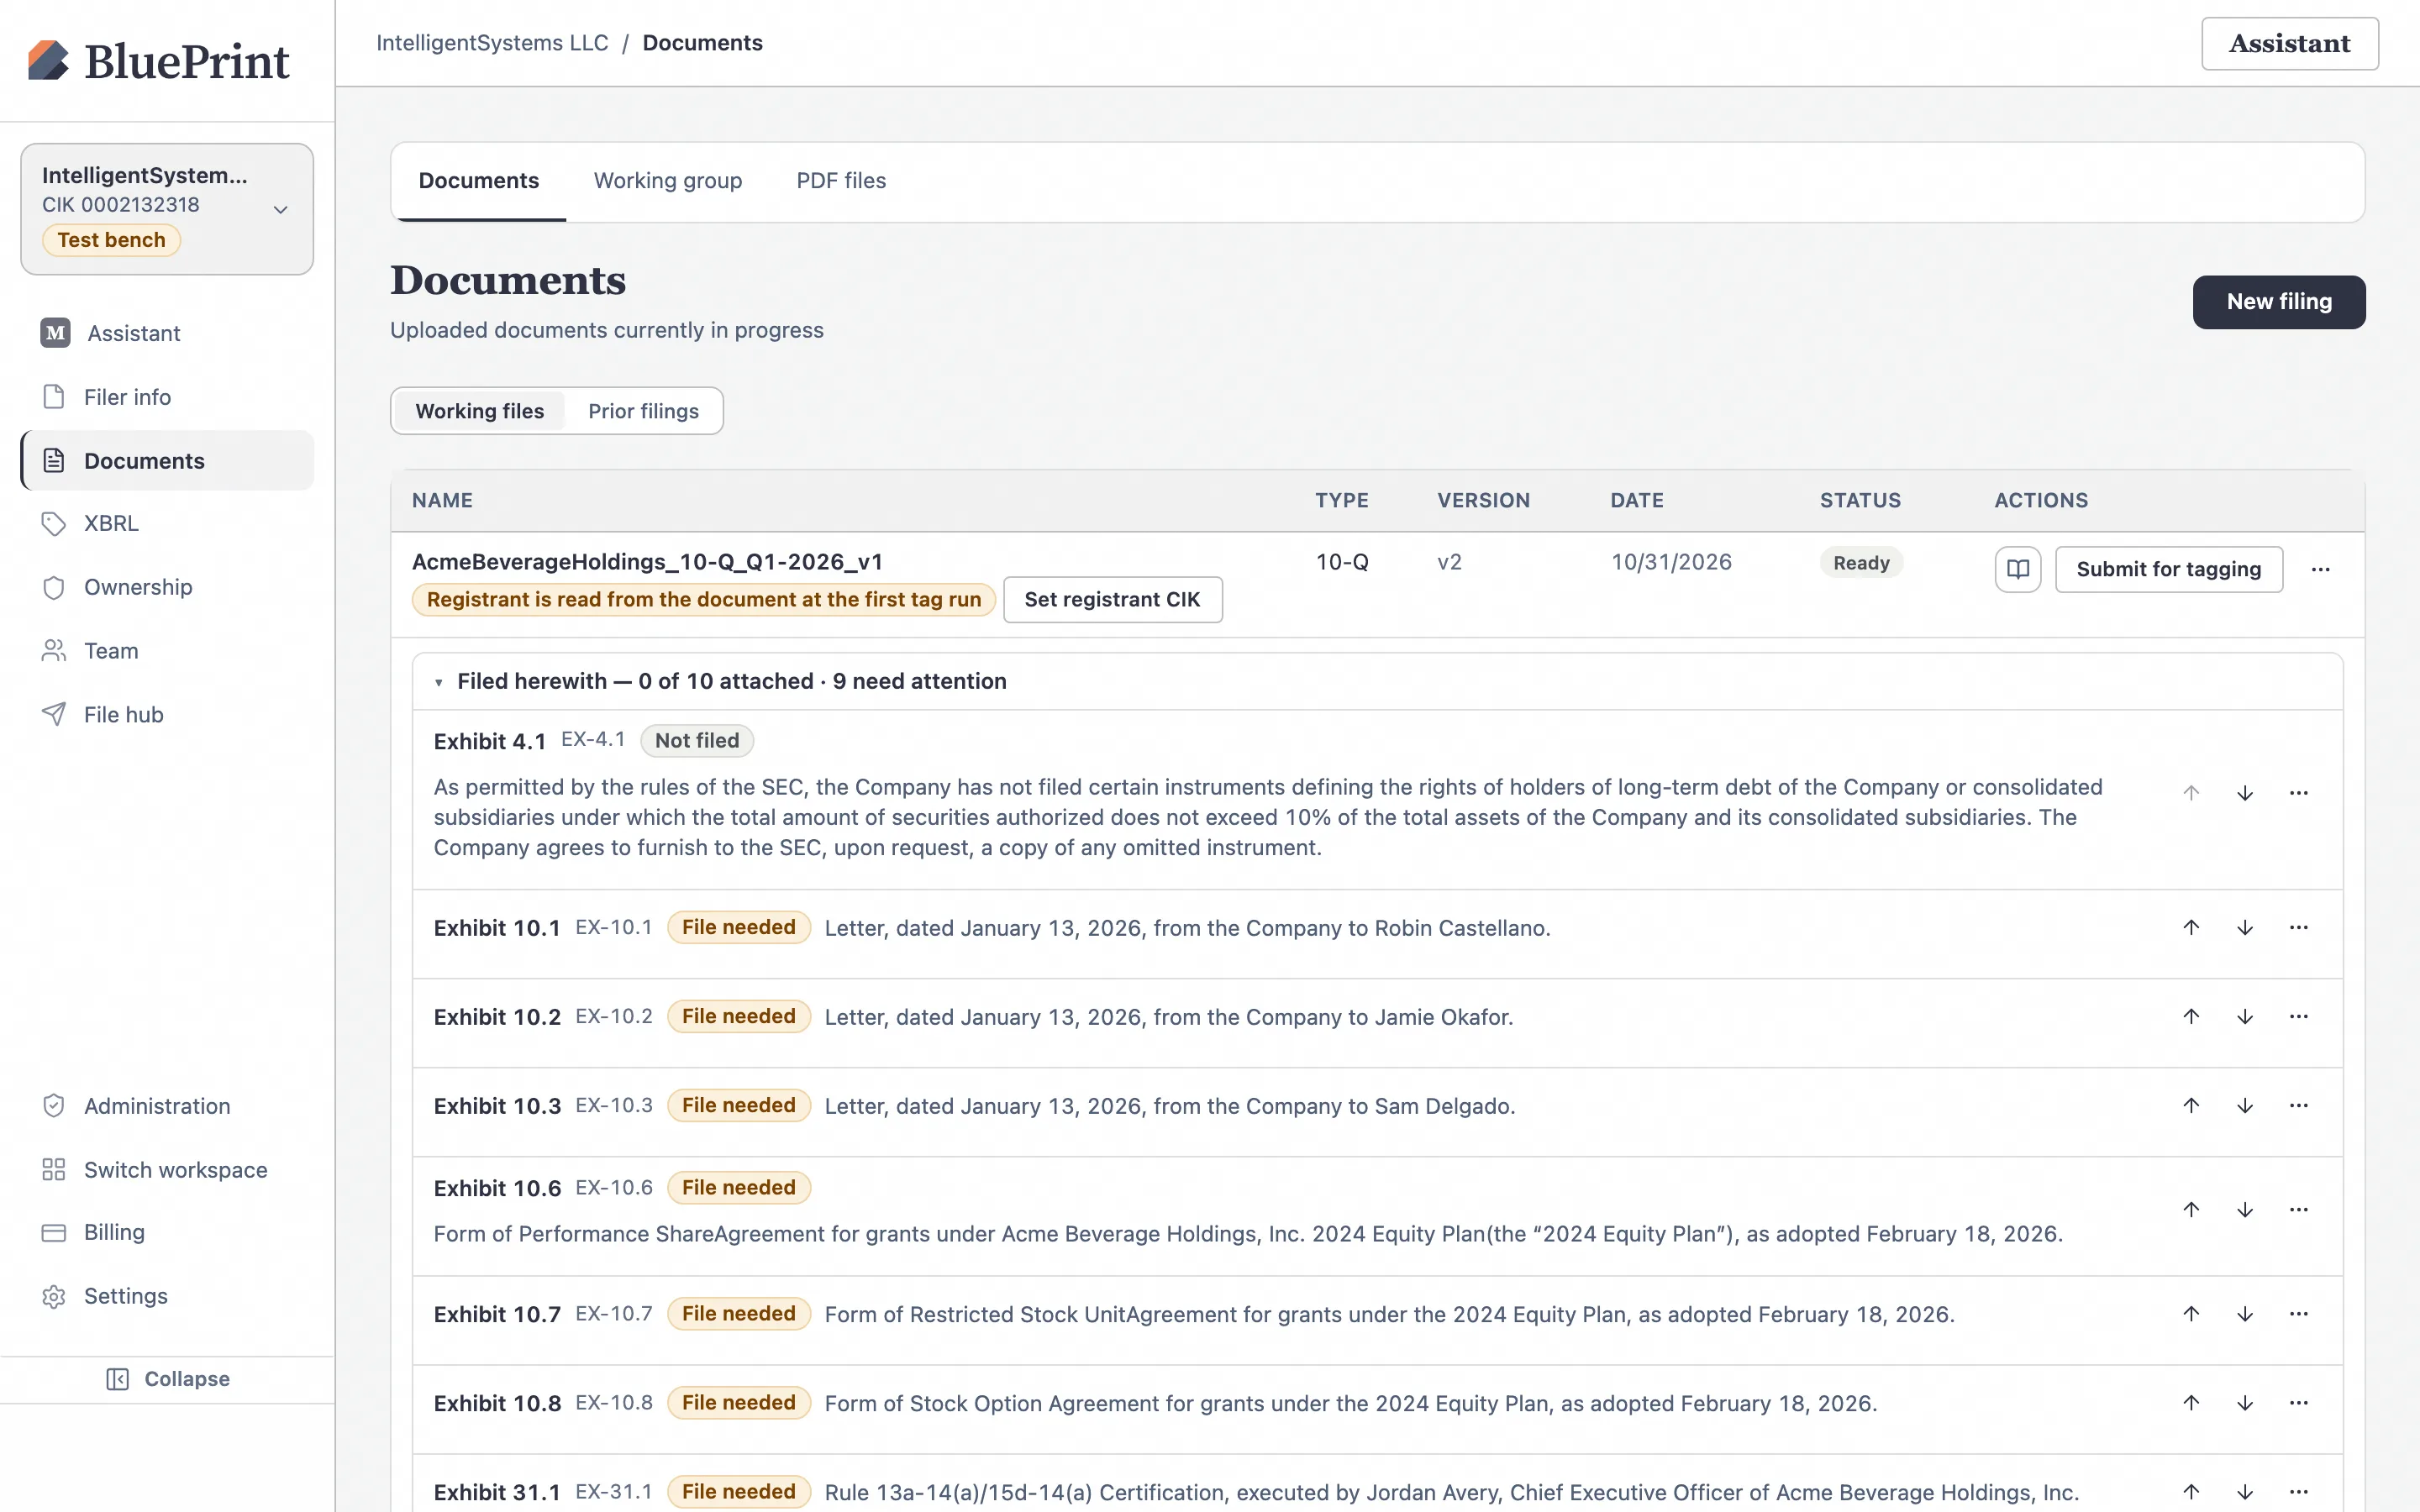
Review the converted filing row and auto-detected Exhibit Index
As soon as conversion finishes, the row’s status badge updates to Ready. If your Word draft contains an Exhibit Index, BluePrint automatically parses each exhibit number, description, and filing status (Filed herewith, Incorporated by reference, or Not filed) directly underneath the filing row.
3. Inspect the converted filing & Table of Contents
From the filing row, you can open the document action menu (⋯) to view all document preparation tools or click the book icon to inspect the paginated house print.
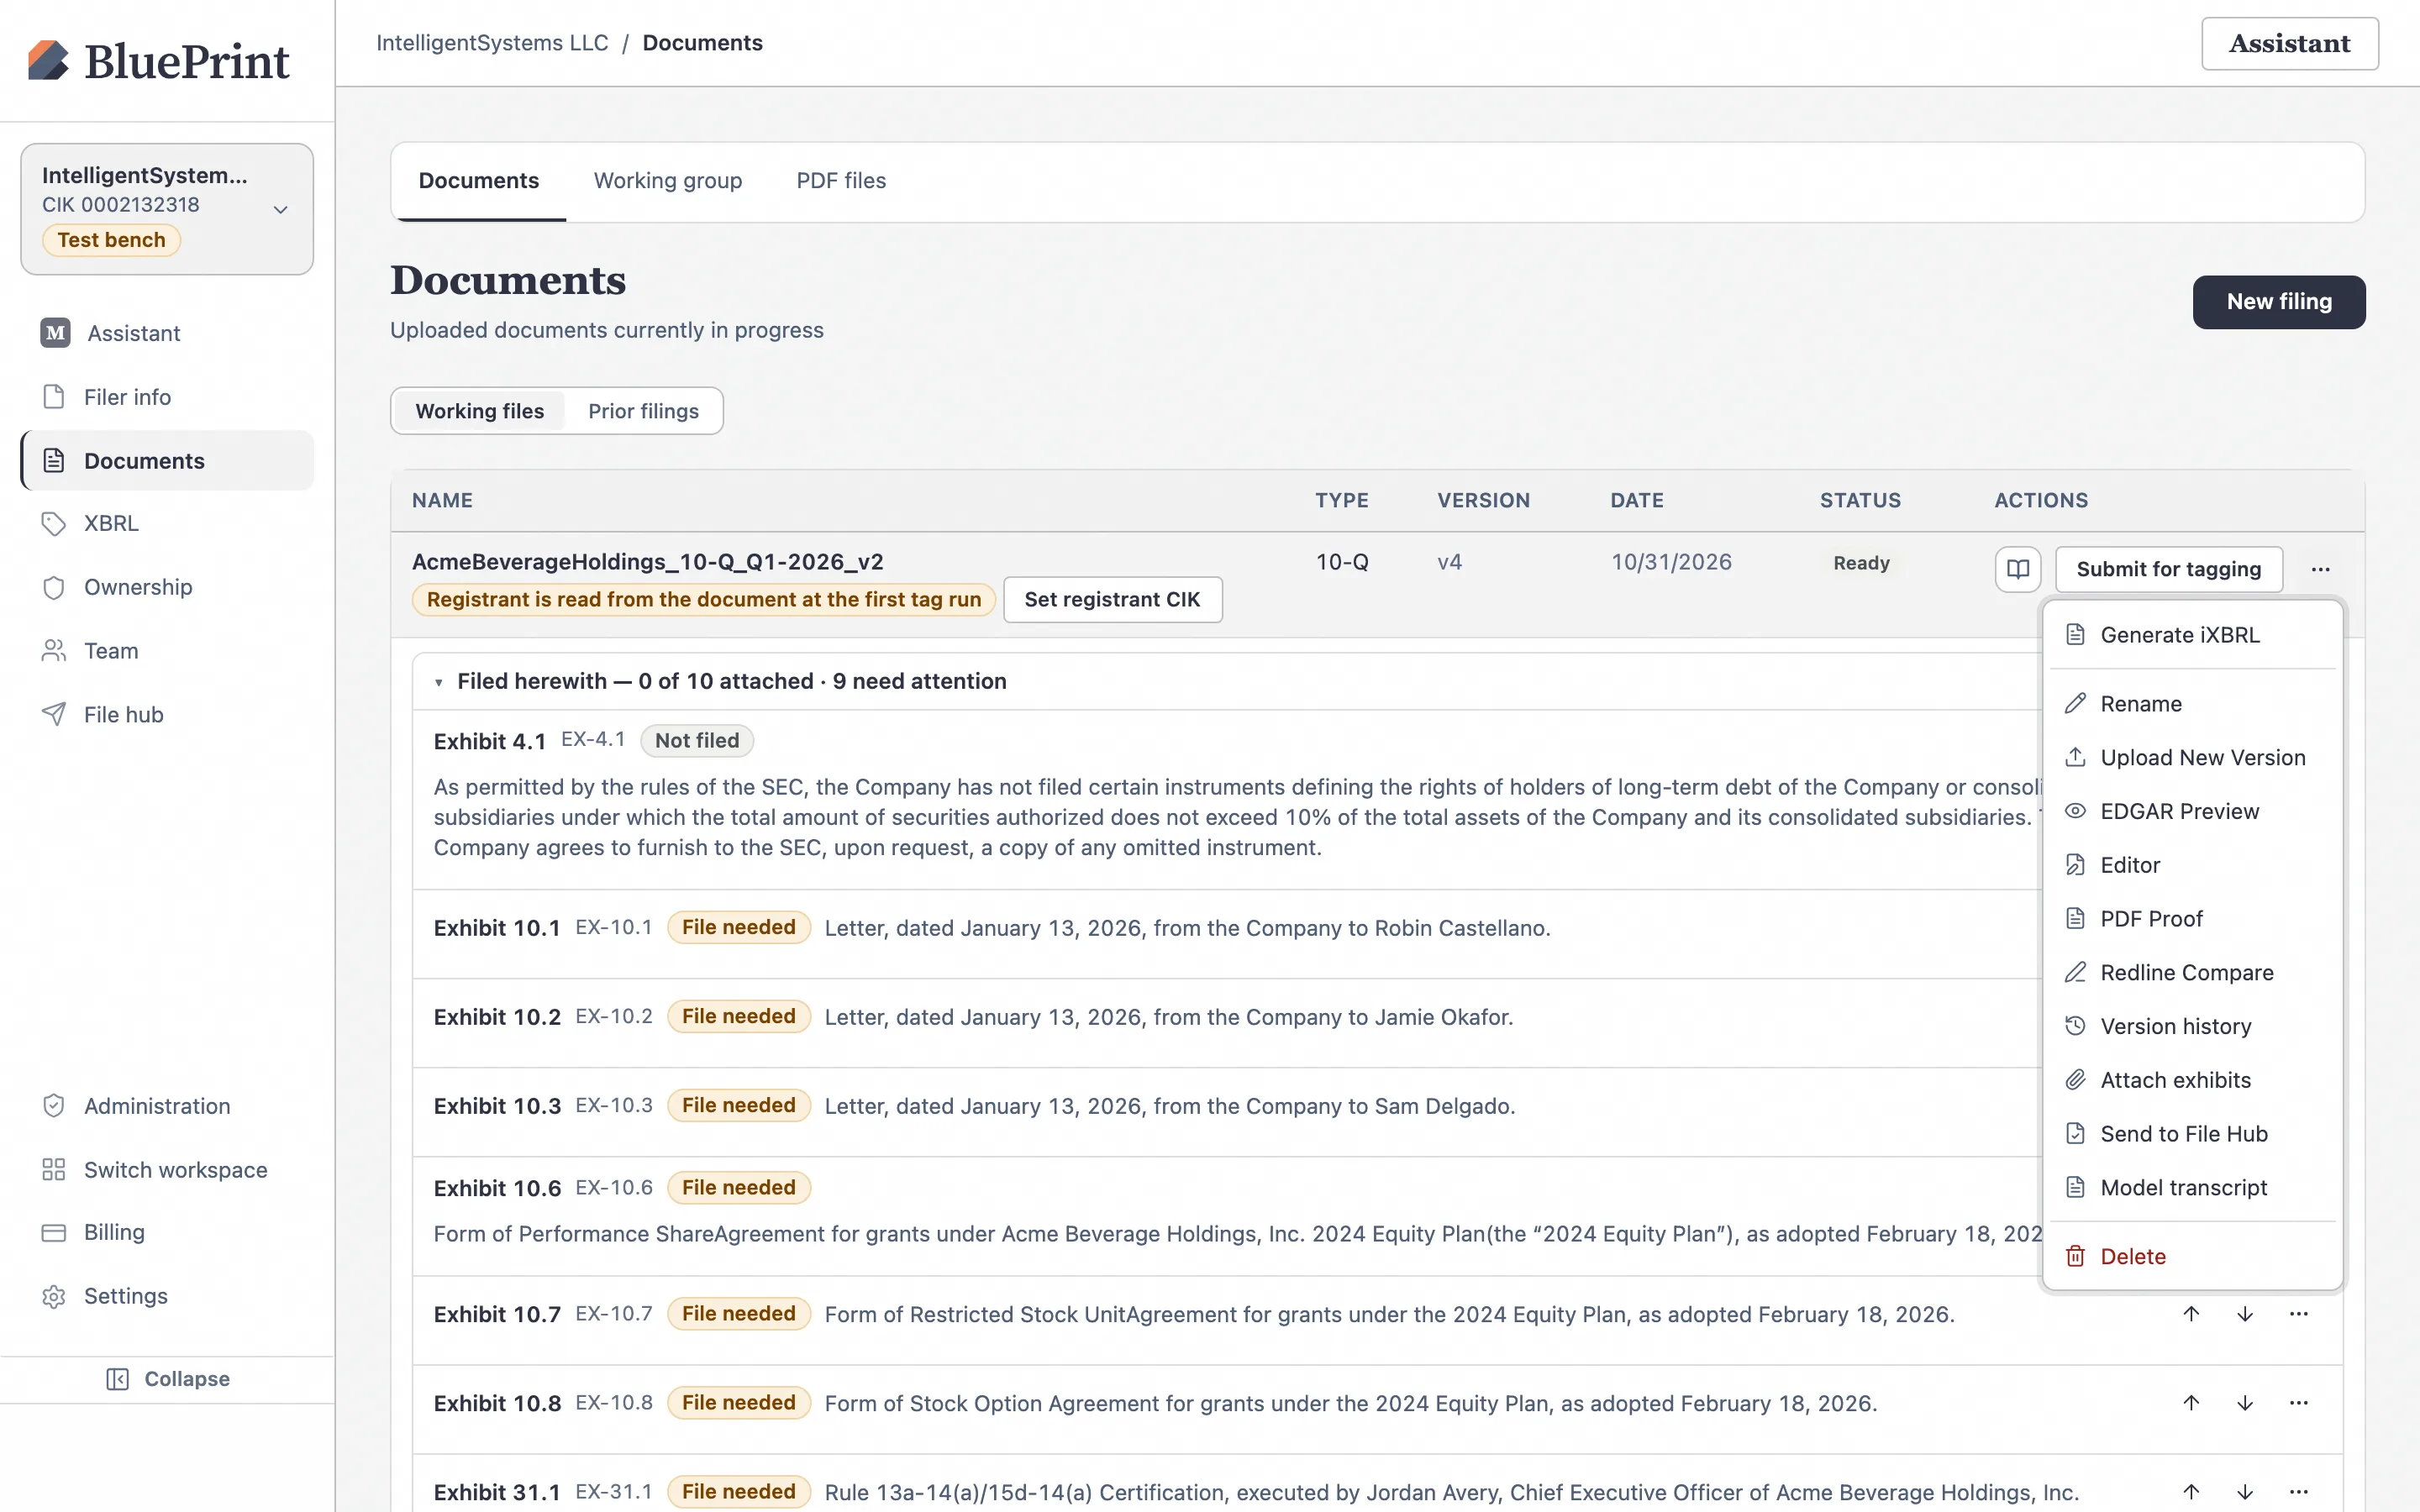
Open the row’s More actions (⋯) menu
Click ⋯ on the right side of the filing row to see all actions available for a converted document: Edit, PDF Proof, Produce e-Red or Convert to ARS (depending on form type), Send to File Hub, Upload New Version, Redline Compare, Download Zip, and Delete.
Open the paginated Document Viewer
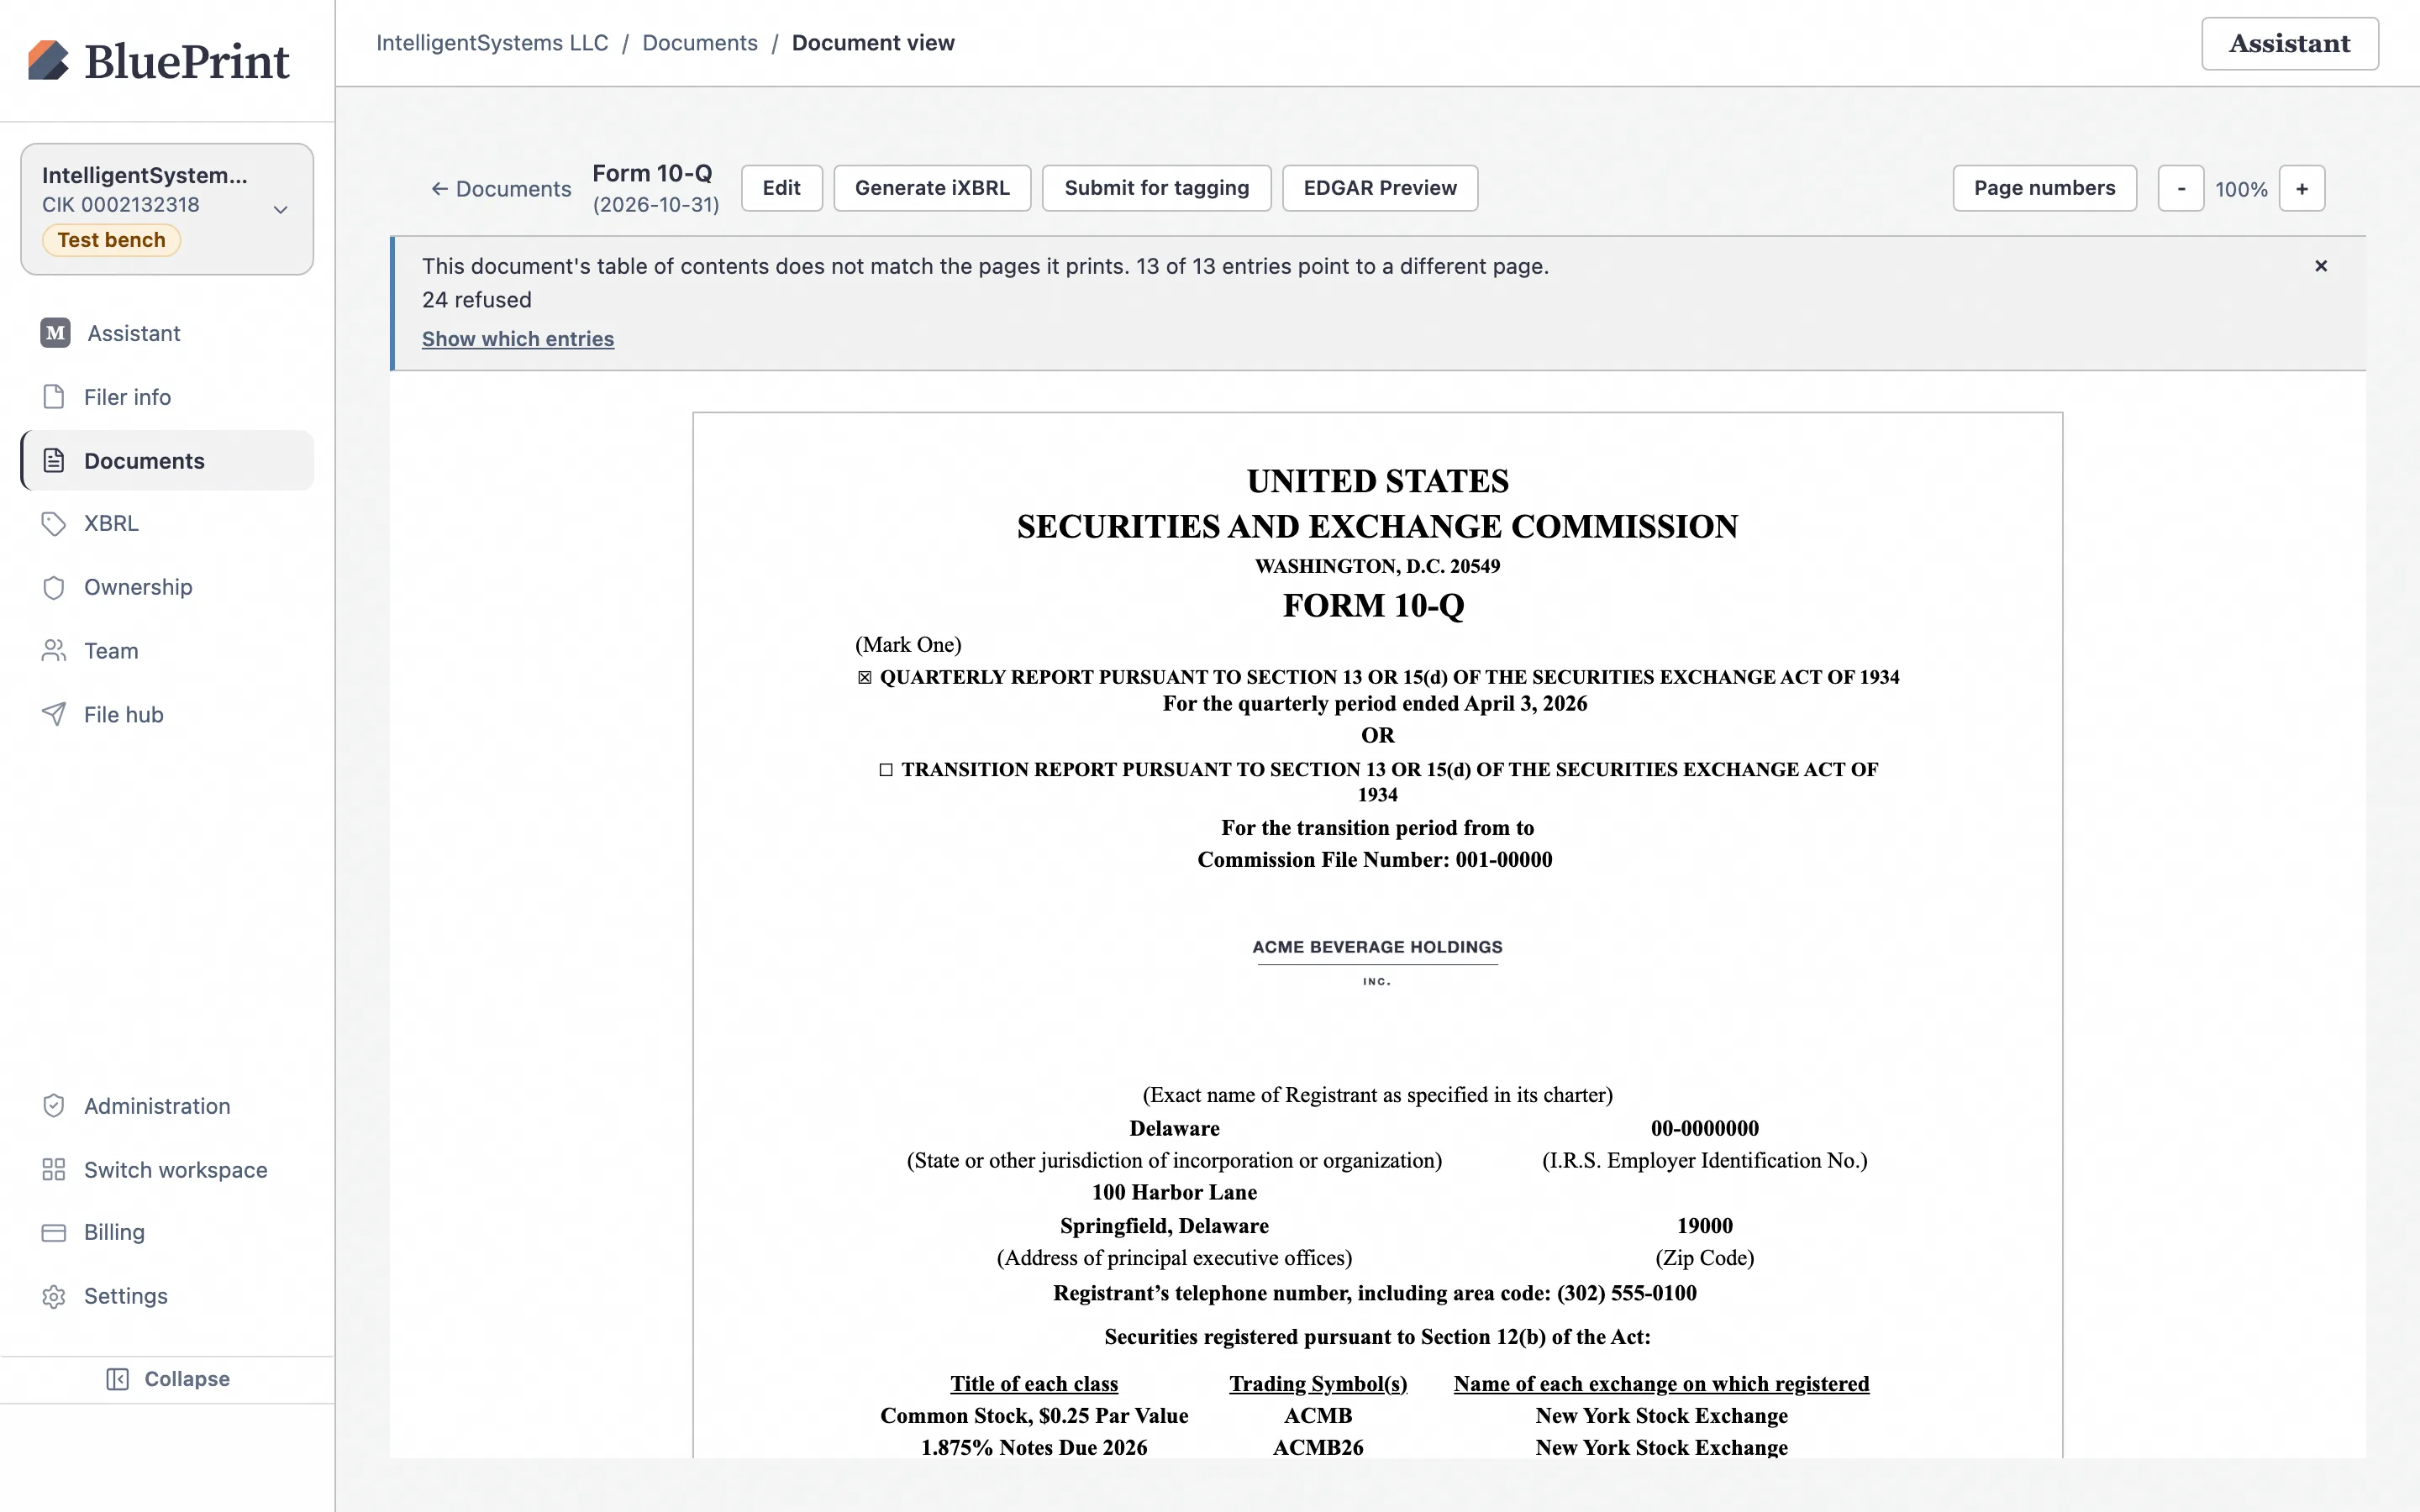
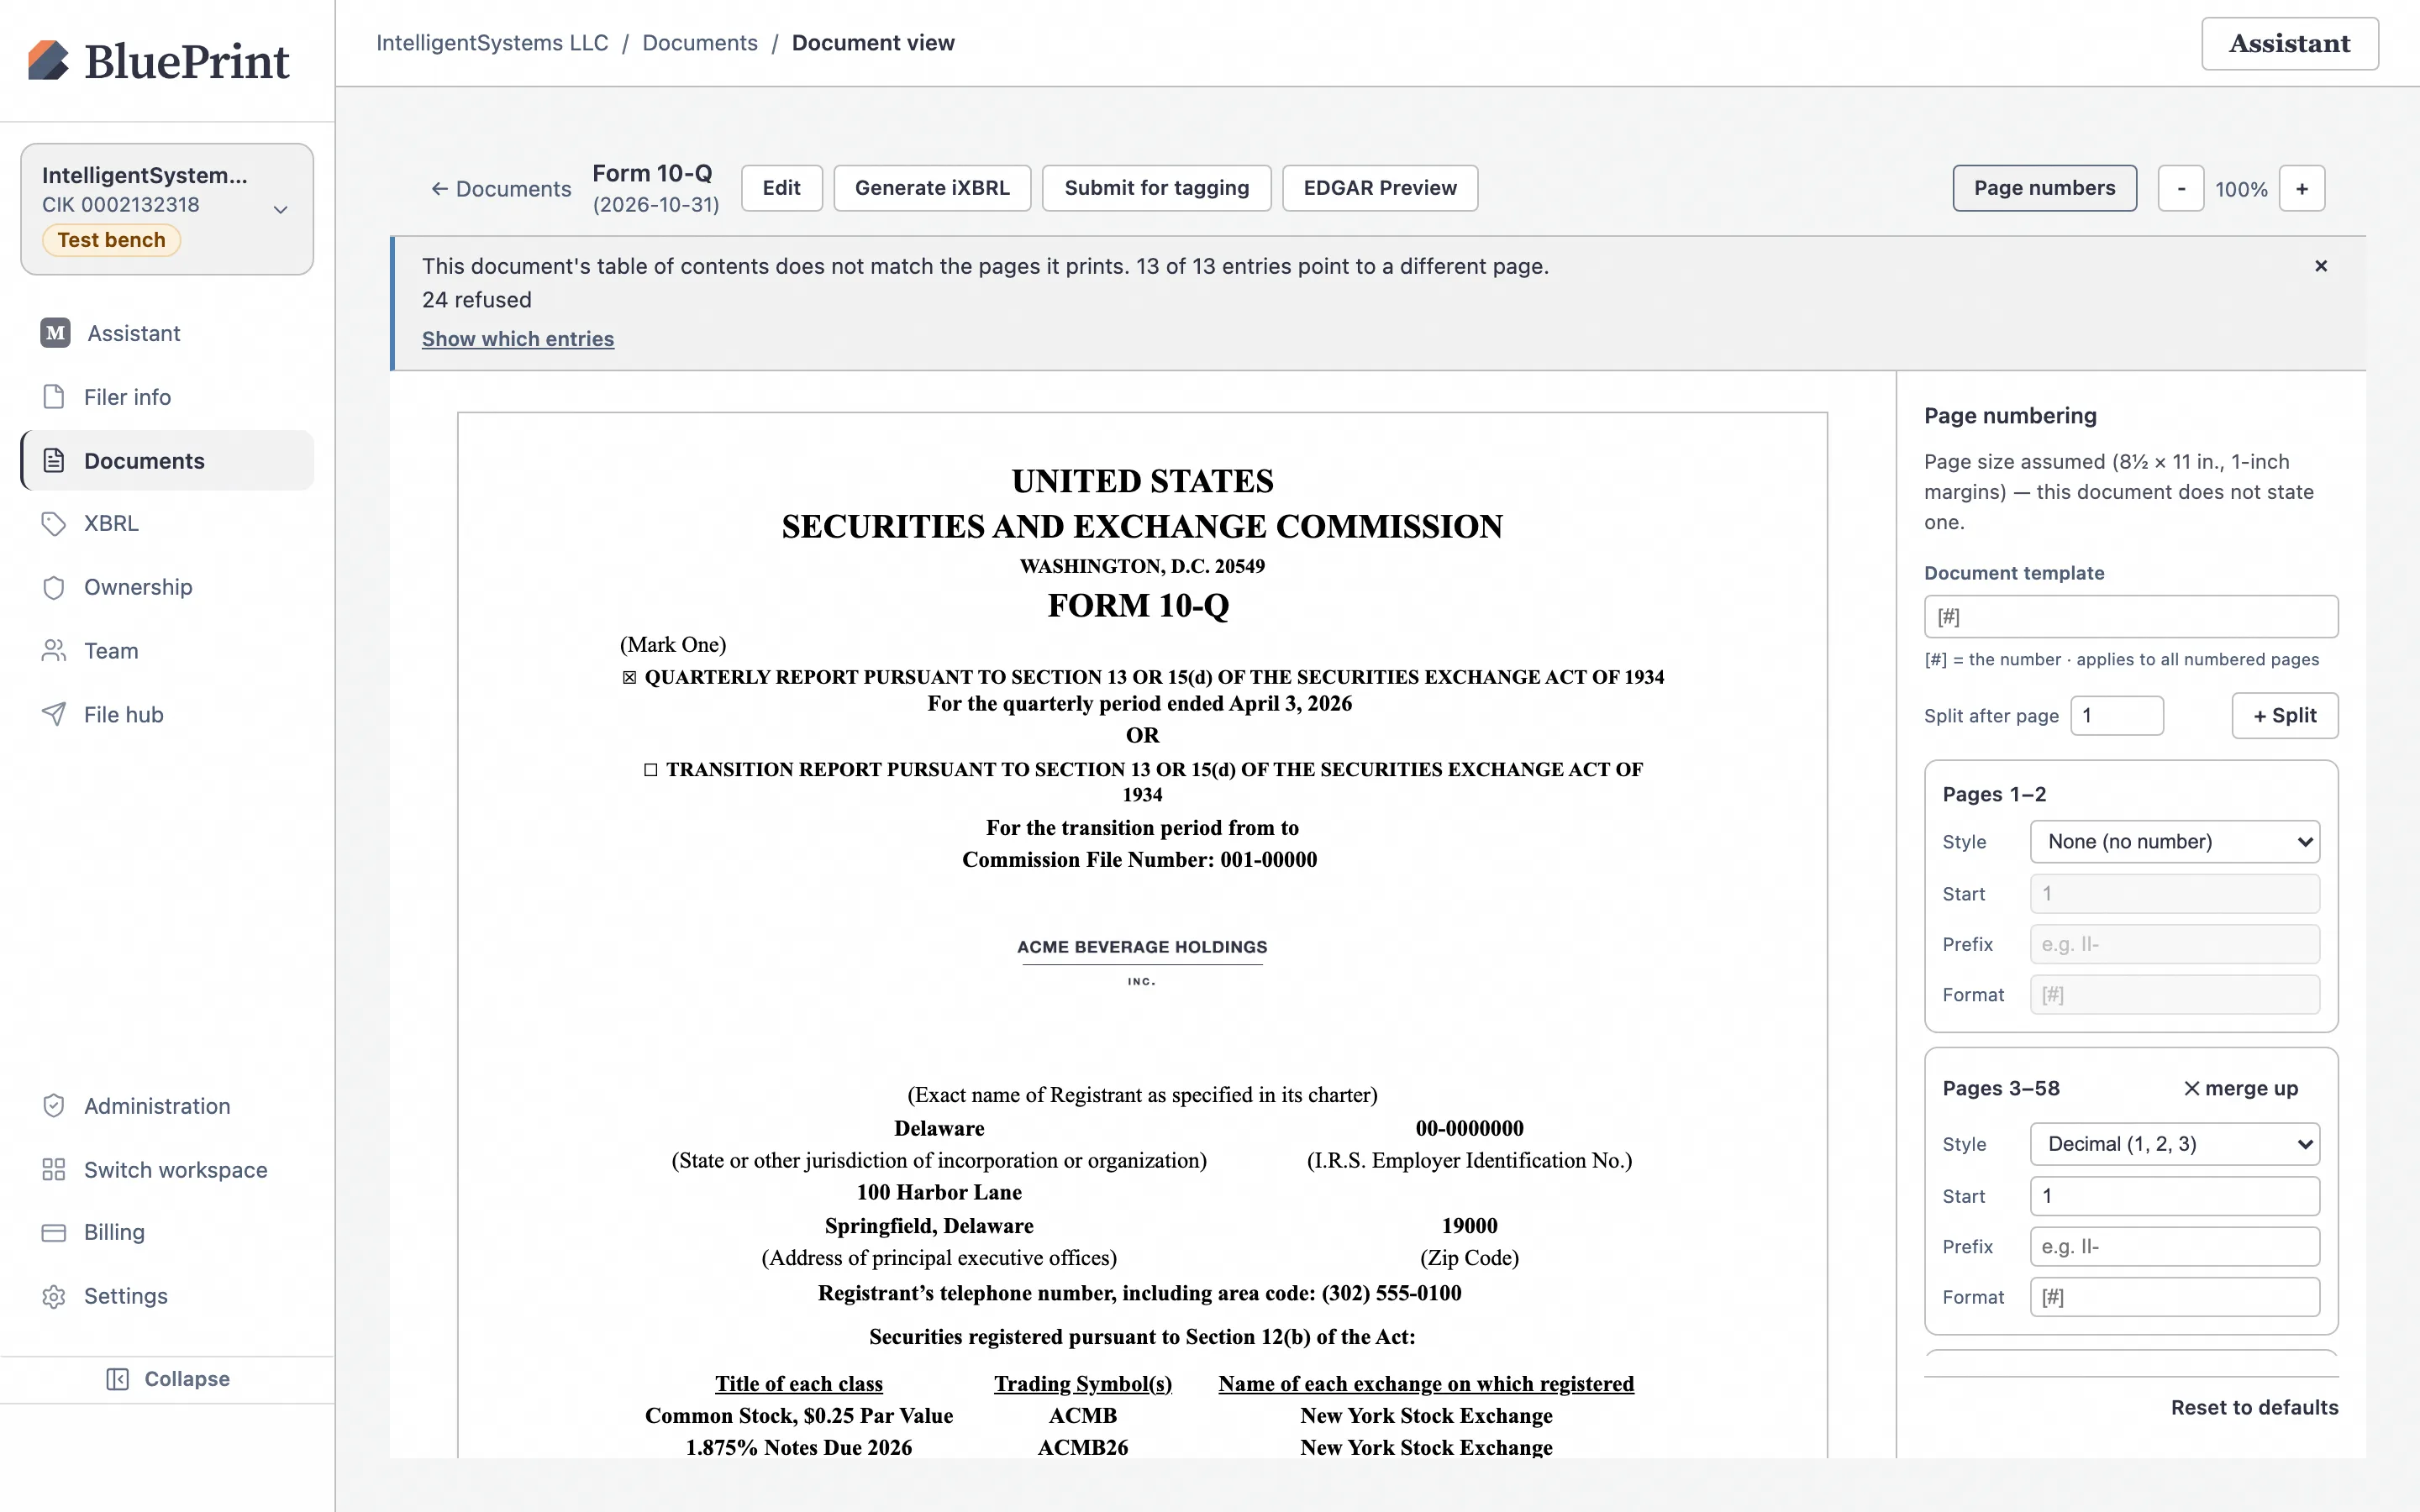
Click the book icon (or click the document title) to open the Document Viewer (/documents/view). The viewer renders the converted filing in house-print layout with a collapsible Contents outline on the left and view controls across the top toolbar.
Verify Table of Contents page numbers
Click Page numbers in the viewer toolbar. BluePrint compares every page number printed in your Table of Contents against the actual page where that section lands in the paginated document, flagging any drift before you file.
4. Open the SEC EDGAR HTML Preview
Before tagging or assembling your submission package, verify the pure EDGAR HTML output that will be transmitted to the SEC.
Switch to EDGAR Preview
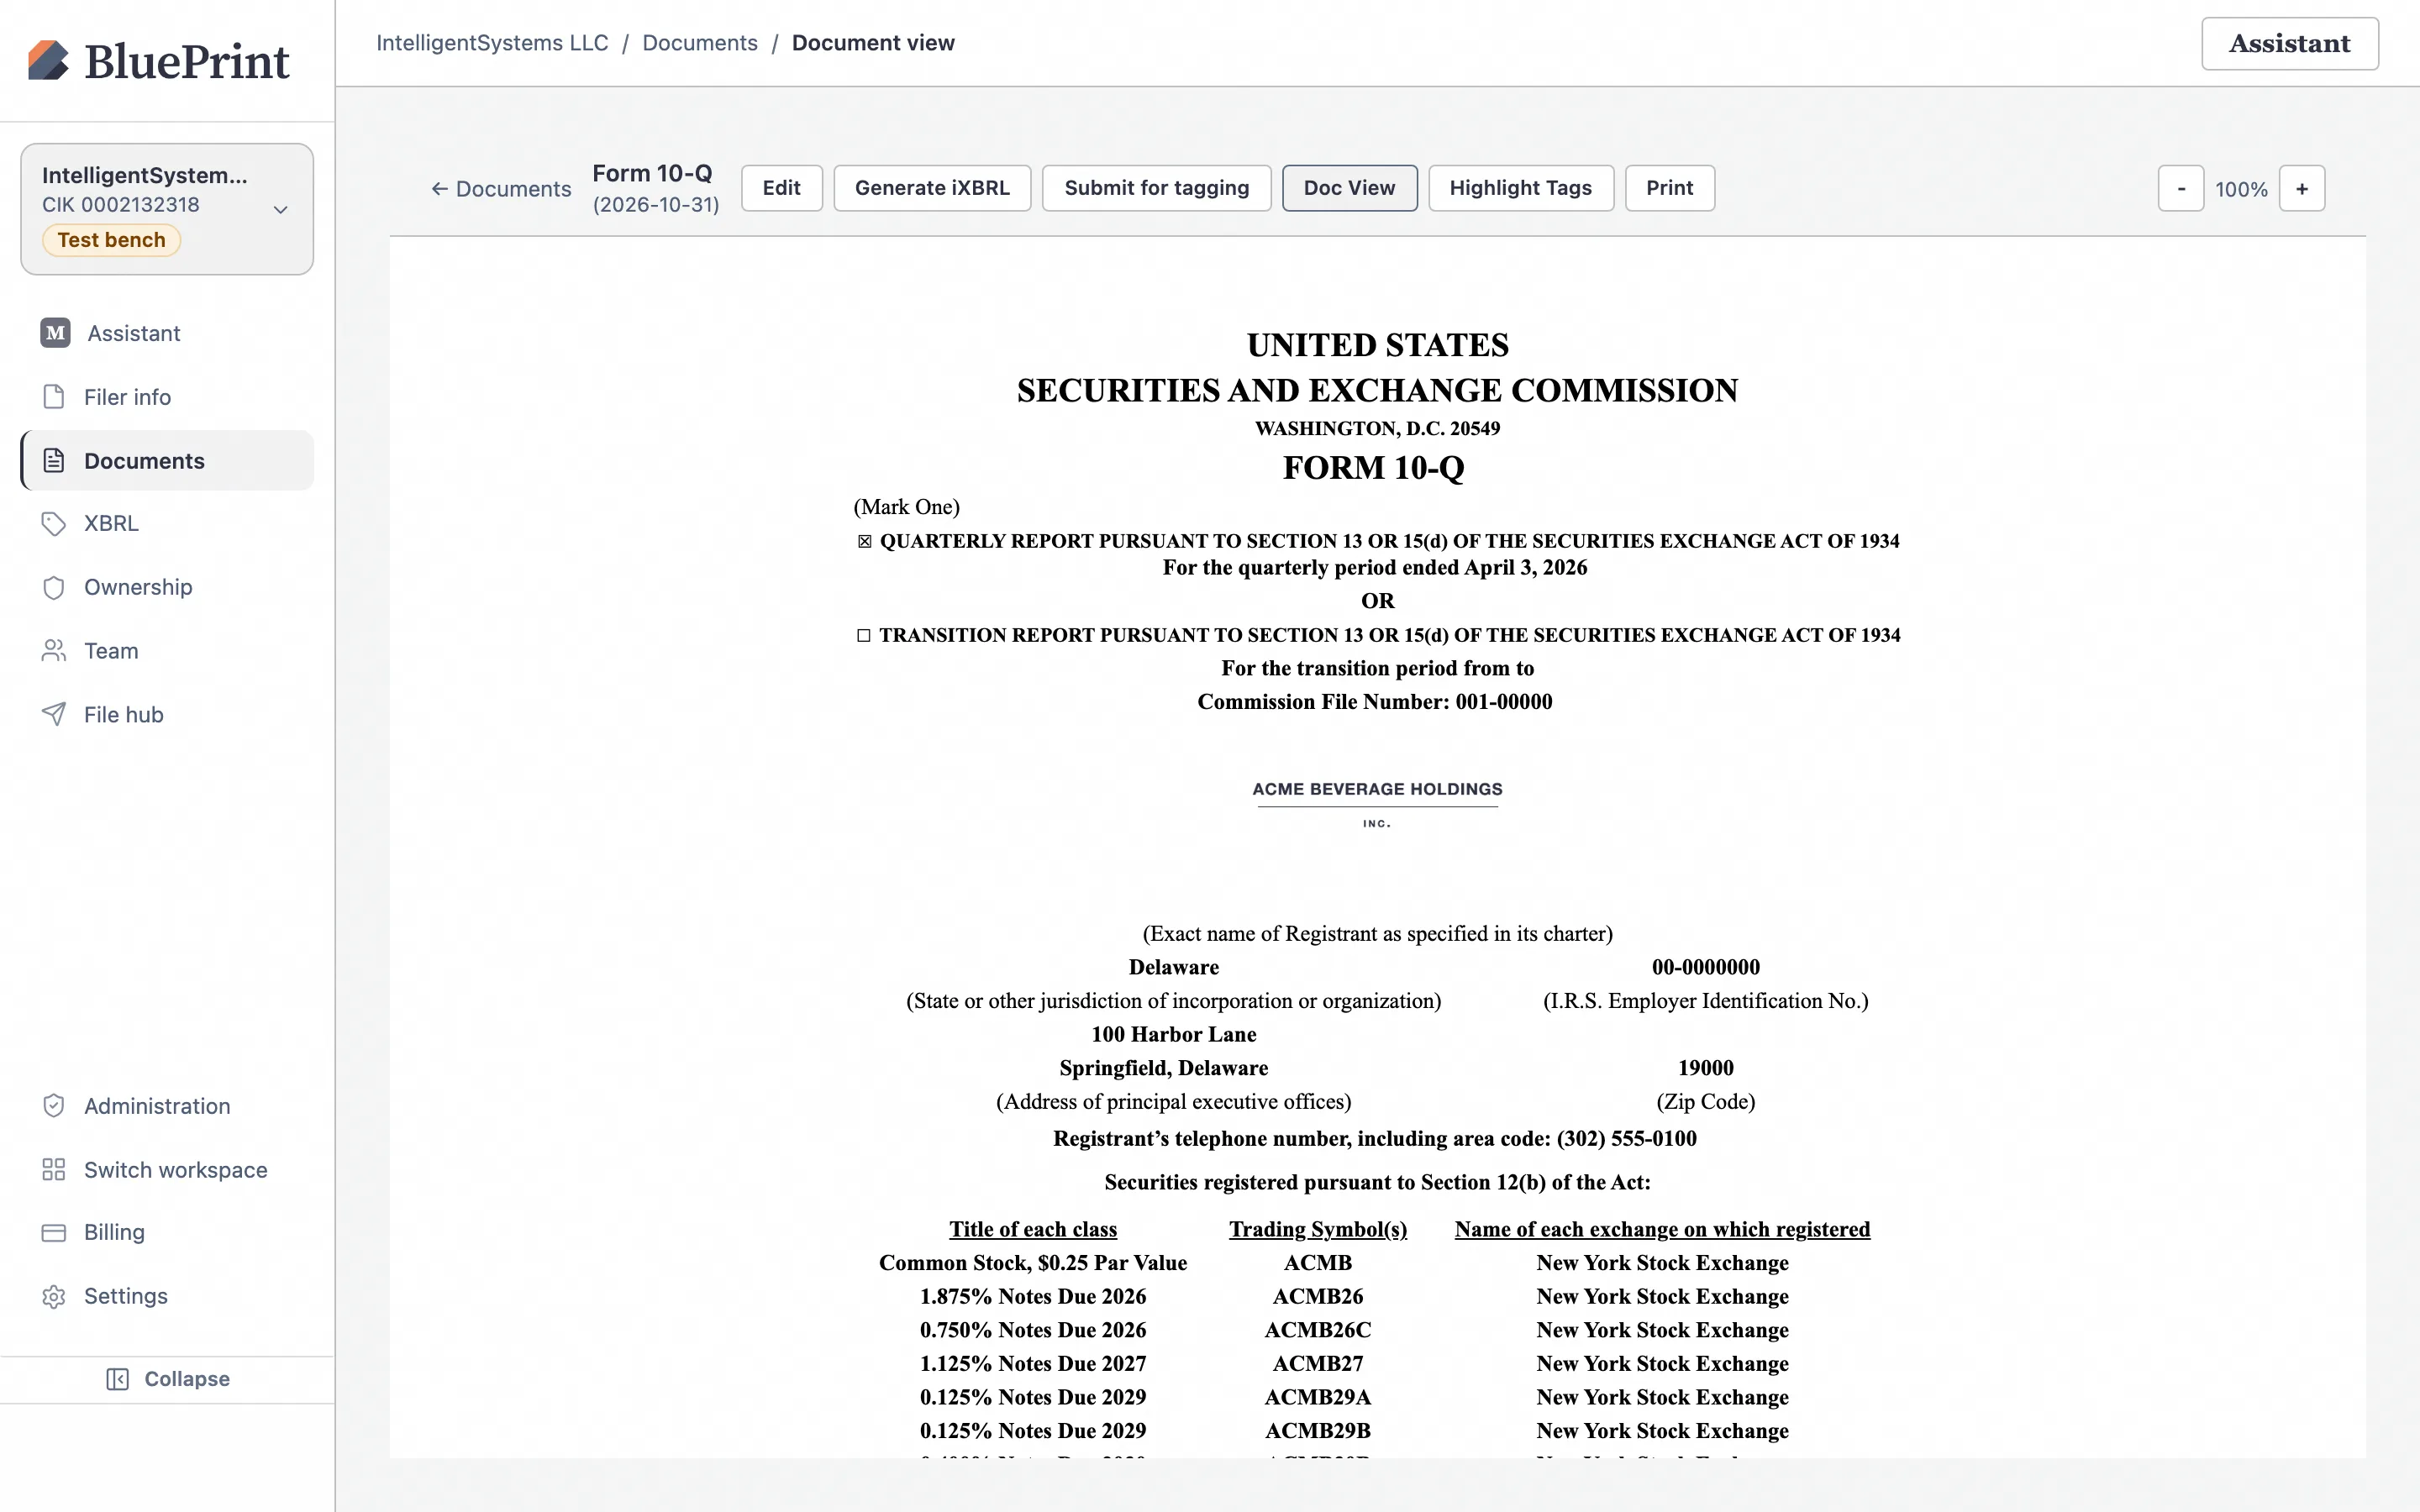
Click EDGAR Preview in the viewer toolbar. BluePrint displays the exact SEC-compliant HTML output (compliant with EDGAR Filer Manual HTML tags, ASCII/entity rules, and table width rules) so you can inspect financial statement alignment, indent levels, and rule lines.
5. Next steps: Edit, attach exhibits, or tag
Once your Word filing is EDGARized and at Ready status, you can proceed in any order:
- Attach exhibits: Expand the exhibit tray below the filing row to attach exhibit files or incorporate prior filings by reference (Guide 02: How to Attach & Manage Exhibits).
- Edit in browser or upload a revised Word draft: Make text or table edits directly in the Document Editor (Guide 03), or upload a revised
.docxand run a word-by-word blackline in Redline Compare (Guide 04). - Run AI-assisted iXBRL tagging: Click Submit for tagging on the filing row to tag face statements, footnotes, and cover-page DEI facts (Guide 08: How to Generate, Review & Modify iXBRL Tags).